


Planning an event means thinking about everything, from lighting and music to layout and stage decoration. One easy way to make your event look clean, organized, and elegant is by using pipe and drape systems. These setups can quickly transform any space into a beautiful backdrop or booth.
To install pipe and drapes, first measure your space carefully. Then, place base plates where each upright will go. Next, attach the uprights to the base plates. After that, slide in the crossbars and hang the drapes. Finally, check for safety and make final adjustments. Consider getting help from a pipe and drape rental company for a stress-free setup.
Step-by-Step Process to Install Pipe and Drape
Here are the six easy steps to install pipe & drape:
Step 1: Measure the Space
Before you start, use a tape measure to find the exact width and height of the area you want to cover. This measurement helps you decide how many uprights, crossbars, and drapes you need. Always allow extra room at the edges in case adjustments are needed later. Proper measurements ensure your setup fits perfectly and looks clean.
Step 2: Lay Out the Base Plates
Base plates are flat metal pieces that keep the upright poles standing straight. Lay them down where you measured earlier. Ensure they are placed evenly and not too close or far apart. This base layout forms the skeleton of your setup and supports everything else.
Step 3: Attach Uprights to Base Plates
Now, slide the upright poles into the holes on each base plate. Make sure each pole is standing straight. Some uprights can extend, so adjust the height to match your plan. Tighten any screws or locks if the system has them. Strong and stable uprights keep the structure secure.
Step 4: Connect the Crossbars
Crossbars connect the top parts of each upright. Slide each crossbar into the hooks or slots at the top of two adjacent uprights. This forms the top frame where your drapes will hang. Crossbars must be tightly secured, so check for a firm connection before moving forward.
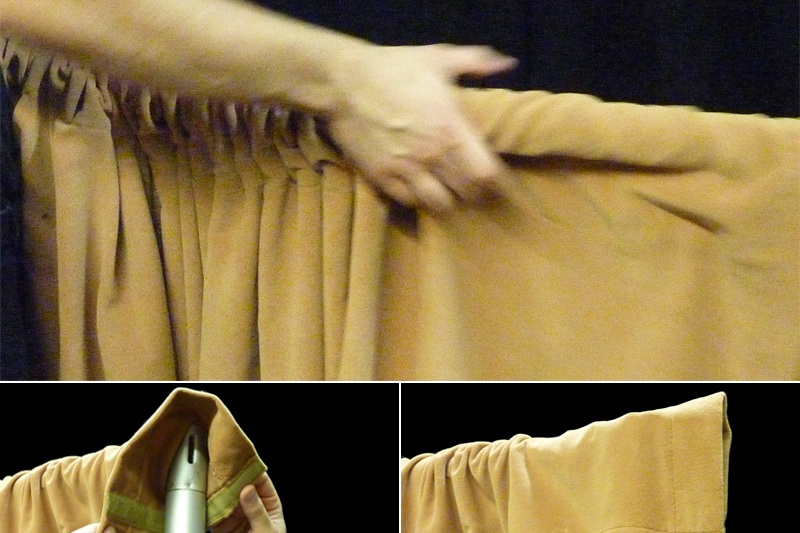
Step 5: Hang the Drapes
Slide your drapes through the crossbars, or clip them on if your system uses curtain rings. Start from one side and work your way across. Make sure the drapes are even and straight. Use wrinkle-free fabric or iron the drapes before hanging for a more polished appearance. You can layer drapes for more style.
Step 6: Final Adjustments and Safety Check
Once the drapes are up, step back and inspect the whole setup. Check that everything looks straight and nothing is wobbling or out of place. If needed, adjust the height of the uprights or spread the drapes more evenly. Also, ensure the base plates are fully flat on the ground and not a tripping hazard.
Pro Tips From Event Setup Experts
Professional event planners recommend a few extra tips to make your setup even better:
- Use sandbags or weights on the base plates for extra stability.
- Double-layer your drapes for more depth and better sound control.
- Choose wrinkle-resistant fabric for a smooth, clean appearance.
- Keep extra hooks or clips in case something breaks or gets lost.
- Label your parts to make the takedown and reassembly faster for next time.
Common Mistakes to Avoid When Installing Pipe and Drape
Even though the setup is simple, people often make mistakes. Avoid these common errors:
- Skipping measurements can result in drapes or poles that are too short and don’t fit.
- Using uneven base plates leads to a shaky and unsafe structure.
- Not checking for wrinkles or stains on drapes can ruin the visual appeal.
- Forgetting to test the setup for safety may cause accidents during your event.
- Overstretching crossbars might damage the frame or make it unstable.
By remembering these mistakes, you can avoid problems and make your event look smooth and professional.
Conclusion
Setting up pipe and drape doesn’t have to be difficult. With the right steps, measuring, laying out base plates, connecting parts, and doing a final check, you can create a neat and stylish space for your event. Following expert tricks and avoiding basic mistakes will make the process even smoother. Use a trusted pipe and drape rental provider to handle the setup for best results, or if you’re short on time.